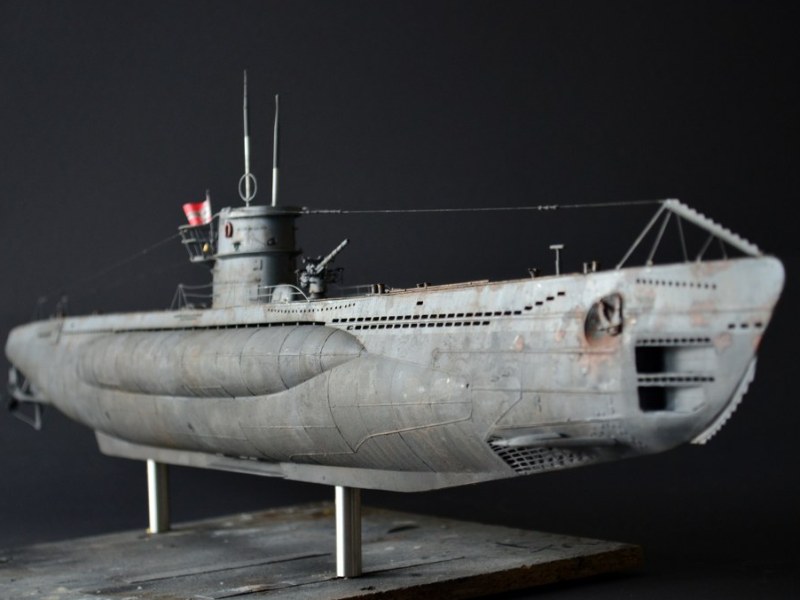
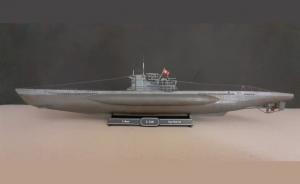
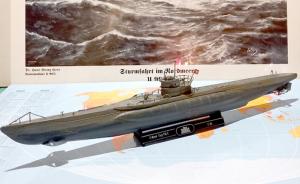
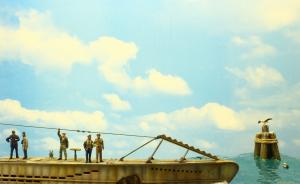
U-Boot Typ VII CU 96 - "Das Boot", Kpt.Lt. Heinrich Lehmann-Willenbrockvon Michael Franz (1:72 Revell)
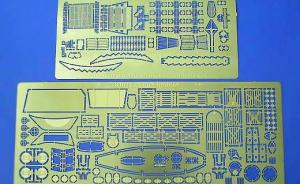
Verwendetes ZubehörPontos: Detail-Set von Pontos (Ätzteile, gedrehte Messingteile, Resinteile, Echtholzdeck) RC-Subs: Ätzteile WEM (White Ensing Models): Ätzteile Archer Fine Transfers: Nieten & Schweißnähte (Decals) Eduard: Deckgeschütz aus Resin Blue Ridge Models: Oberteil des Druckkörpers
BaubeschreibungDem komplett umgebauten Modell aus dem Hause Revell wurde zunächst der Rumpf korrigiert. Sämtliche Flutschlitze und Öffnungen wuden geöffnet. Mit dem Fräser im Dremel wurde die Oberfläche überarbeitet, mit einem Messer und runder Klinge die Bereiche zwischen den jeweiligen Nietenreihen "eingedellt".
Die Bereiche um die Flutschlitze am Bug und Heck sowie die Bereiche der Torpedoluken wurden komplett herausgetrennt und neue Teile aus Ätzteilen in den Rumpf eingesetzt, verspachtelt und verschliffen (mehrere Durchgänge). Die Position des Ankers wurde korrigiert (nach vorn versetzt).
Nach mehreren Spachtel- und Schleifgängen, dazwischen erfolgten Grundierungen, wurden die Nietenreihen und Schweißnähte aus Decals und Spachtelmasse neu aufgebaut, Positionen korrigiert, zusätzliche Nieten und Schweißnähten ergänzt. Die Torpedoluken wurden im geöffneten Zustand aus Ätzteilen einseitig dargestellt, die Klappen selbst wurden aus Ätzteilen neu aufgebaut und weiter detailliert.
Nach Anbringen der beiden Edelstahlfüße für das Display wurden weitere Verstrebungen im Innenbereich ergänzt, auf denen dann der aus Resin erstellte obere Bereich des Druckkörpers eingepasst wurde.
Nachdem die "groben" Arbeiten am Rumpf fertig gestellt waren, wurden diverse Ätzteile ergänzt, weitere Details aus Kunststoffprofilen und Draht ergänzt. Es folgte dann auf eine schwarze Grundierung ein Aufmalen der Rostflecken. Hierfür wurden die Rostfarben von Lifecolor verwendet, welche fleckig aufgemalt wurden. Hierauf wurde ein Salz-Wassergemisch ergänzt.
Die Lackierung folgte dann mit Tamiya Acrylfarben, wolkig und durchscheinend, so dass die schwarze Grundierung als Schattierung wirkt. Zunächst der obere Bereich, dann der untere Bereich. Mit abgedunkelter und aufgehellter Grundfarbe wurde jeweils in mehreren Schichten übernebelt, mit Klarlack fixiert, dann das Salz entfernt. Mehrere Washings mit Ölfarben (Schwarz, Braun, Weiß, Blau, Grau) folgten.
Die Schiffschrauben aus Messing wurden zunächst mit Eisenfarbe bemalt, anschließend wurden weitere Farben mit einem Schwamm aufgetupft (vor allem Weiß, Rost, Grün, Grau).
Der Anker wurde zunächst mit einer Mischung aus Graphitpuder und Farbe betupft. Dies sorgt für die richtige Struktur. Anschließend mit Rostfarbe bemalt, mit Salz bestreut und Grau lackiert, dann das Salz entfernt und der Anker montiert.
Es folgte das Echtholzdeck, welches nach Montage mit diversen dunkelbraunen Ölfarbenwashings gealtert wurde.
Die Anbauteile auf dem Deck wurden mit Ätzteilen weiter detailliert, teilweise wurden Messingprofile verbaut.
Der Turm wurde nach Plan gebaut, mit vielen weiteren Details versehen und analog zum Rumpf lackiert und gealtert.
Das vordere Geschütz entstand aus Resin und Ätzteilen von Eduard, das Luftabwehrgeschütz hinter dem Turm besteht komplett aus Ätzteilen und Messingdrehteilen von Pontos und RC-Subs.
Ist der Turm montiert, folgen Relings, farbliche Anpassungen, Nacharbeiten etc. bevor dann die Takelage und die Flagge noch ergänzt wurden.
Michael Franz, Publiziert am 05. April 2016 © 2001-2026 Modellversium Modellbau Magazin | Impressum | Links |

